


How to Guide: Organise You’re In-Class Payments For Your Event With TryBooking

Setting up in-class payments for your event is a great way to accommodate participants who decide to join your class or workshop on the spot.
Whether you’re running a dance class, yoga session, music lesson, or business workshop, offering a seamless payment process ensures a positive experience for everyone involved.
However, relying on cash payments or arranging for a terminal can complicate things, making it harder to focus on your class or lesson.
Luckily, with the TryBooking Box Office App, you can use your phone to take in-person payments, utilising modern contactless payment methods like cards, smartwatches, and phones.
This guide will show you how to set up your event page and accept in-class payments effortlessly using TryBooking, making transactions faster and more convenient for both you and your participants.
Kick Start Your Class or Workshop With TryBooking
- 1. Setup Your Event On TryBooking
- 2. Start Selling In Person Using The Box Office App
Step-by-Step Creating Your Event on TryBooking
1. Event Details: Enter in your event name, description and contact details:
2. Venue Details: Enter in your event location, select ‘general admission’ allocation type for your event and enter the number of attendee spots you estimate you can sell.
3. Sesson Times: Select the date and times you wish to host your classes by selecting ‘Add Sessions’. If you are running weekly or monthly classes add multiple session times, otherwise you only need to have one session if you are running a class non-recurringly. Also note that your booking date should be longer than your event date.
4. Create Tickets: Now it’s time to set up the attendee payments you are taking for your class. You can ‘Create ticket’ for each type of payment.

You can add ‘Group tickets’ to help with bulk orders and provide discounts, like a couple’s discount. Once done, proceed to the next stage.
5. Customising the Event Page: If you have any images for your class, feel free to add them, but it’s only handy if you plan on getting attendees to book online. Otherwise, just click ‘Create Event’ and you can come back to this later.
6. Check Fee Structure: You may want to check you fee structure to ensure that you know how much you are charging your purchasers. We recommend you absorb the ticket fee, which if your item is below $5 dollars or less is 15 cents.
- On the account dashboard, you can click on ‘Events’ on the left blue bar on your screen.
- Underneath you can click on ‘Global Event Settings’.
- Once clicked, you can select the ‘Fee Structure’ tab
- Now you can check which fees you plan to pass on to your ticket buyer and which you wish to absorb.
Managing In-Class Payments with TryBooking Box Office App
You can use the TryBooking Box Office App to accept payments on your own phone, no need for a terminal at your class or workshop. With the TryBooking Box Office App you can accept multiple contactless payment methods, including credit card, debit card, phone tap to pay, smart watches or simply keep track of cash payments as well.
Setting Up the Box Office App:
1. Check Compatibility: Check if your phone is compatible with the app, check our compatibility table below.
2. Download The App: Download the app on either Apple App Store or Google Play Store.
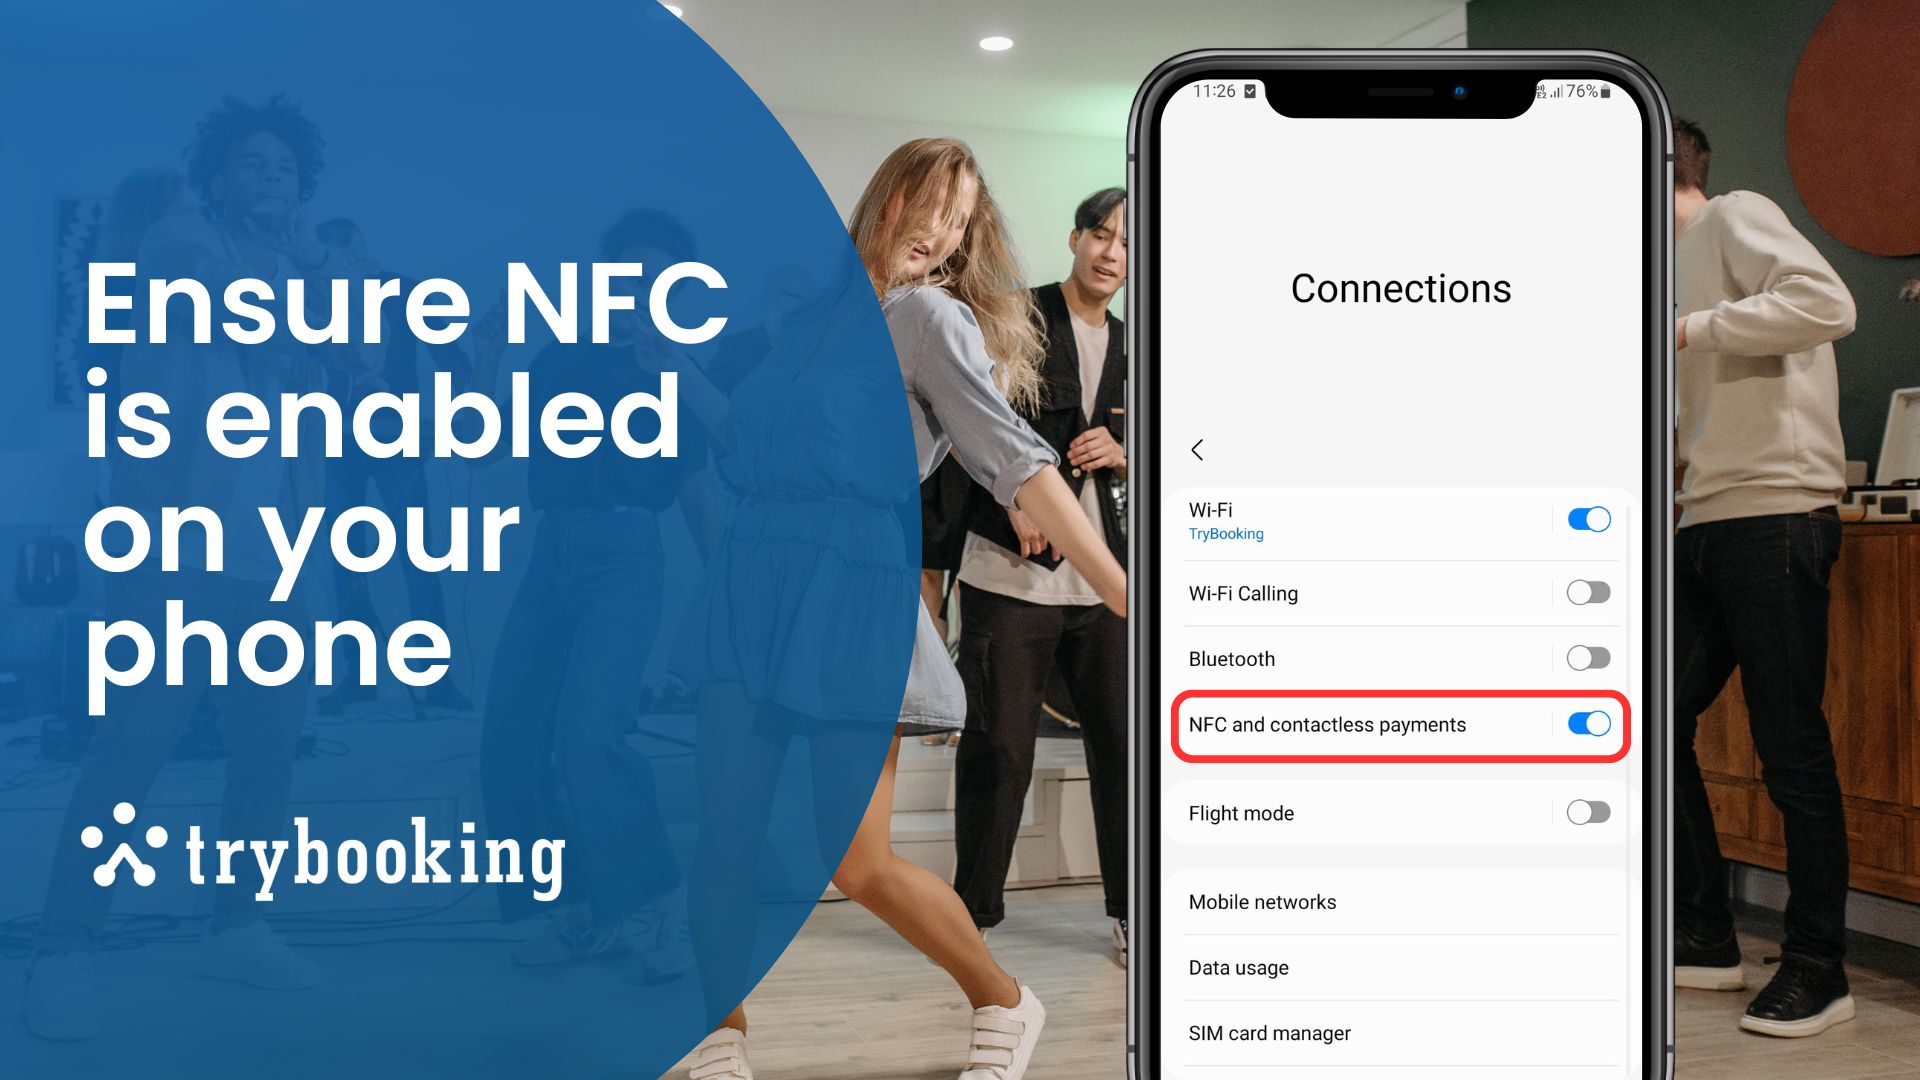
3. Ensure Your Can Tap To Pay: Make sure your NFC is enabled on your device. If you currently pay using your phone, this should already be enabled.
4. Select Your Items: Log in to your account and navigate to your events. Locate your class or workshop and tap on it and select the current session you want to sell from, choose the quantity of items to be sold, and proceed to payment by tapping the checkout button.

5. Checkout: Once at checkout, review the order and then select to take payment through contactless payment or cash.
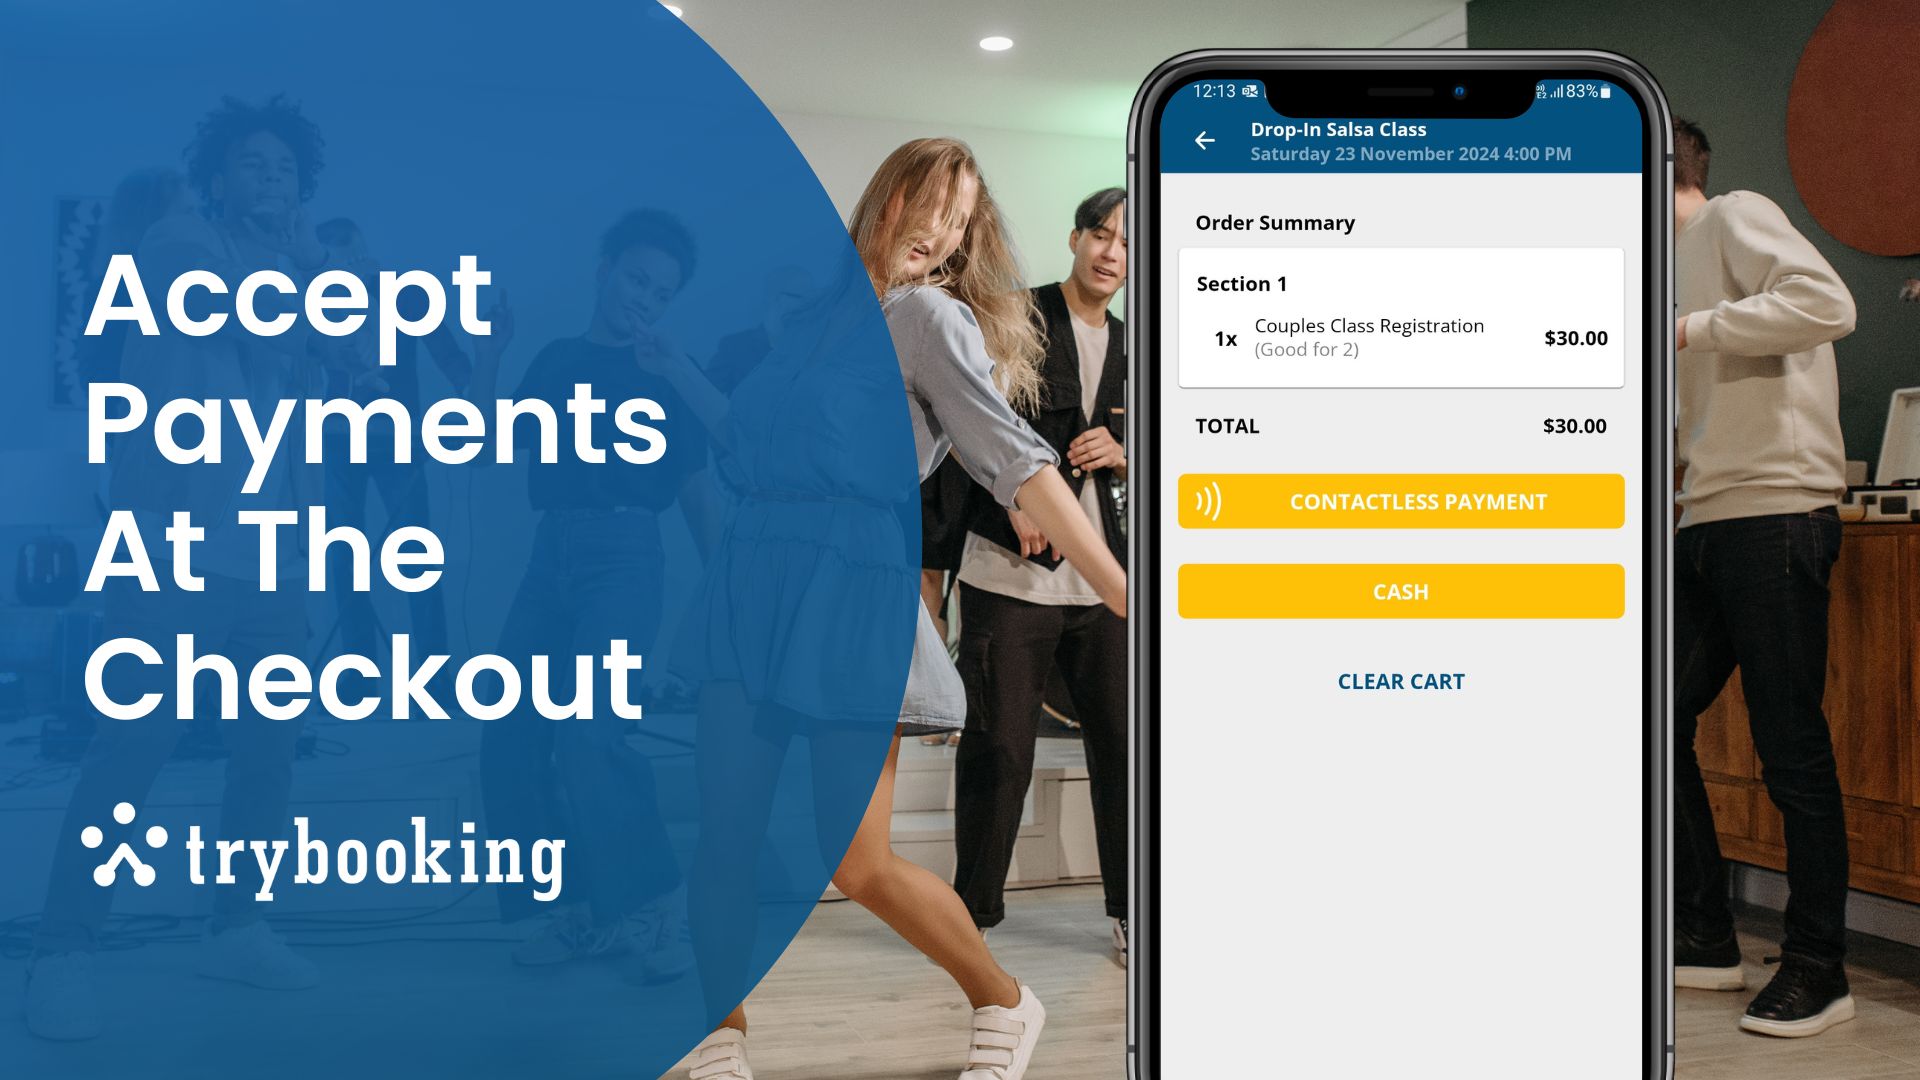
6. Accept Payment: If you select contactless payment, you just need to present your device to the customer to complete the purchase. (Note that you may have a longer wait for the device to pair with app to take the first payment)

Post-Event Wrap-Up
After your class or event, use TryBooking’s reporting tools to review payment data and trends.
Managing in-class payments doesn’t have to be complicated.
With TryBooking and the TryBooking Box Office App, you can easily accept payments in person directly from your phone, ensuring a seamless experience for you and your participants.
If you have any questions or need assistance setting up your event or using the Box Office App, our support team is here to help.
Don’t hesitate to reach out! We’re committed to helping you streamline your event payments and create a successful event experience.
Best of luck with your in-class payments!